To start, I joined one maple board with one walnut board. The walnut will be the shadow. Mostly because I had more maple than walnut or I could have done it the other way. This piece is glued up and my impatience sets in...
After the glue dries...well, almost (more on that,) I cut the pin board off, leaving the pin slots filled with walnut.

Now, as I mentioned...the glue was almost dry when I did this. I don't realize yet, but I'm about to find out that my impatience is NOT a virtue...
I then recut the tail board revealing a 1/8" shadow of walnut. This is where I found my glue wasn't dry and and sent a chunk of walnut flying across the shop. Luckily, I glued it right back in place and still not waiting for it to dry, I supported it side and back and happily began cutting again. I don't get alot of time in the shop, so I forge on at times when it's best to go to bed. **shrug** I'm not about to change after all this time....
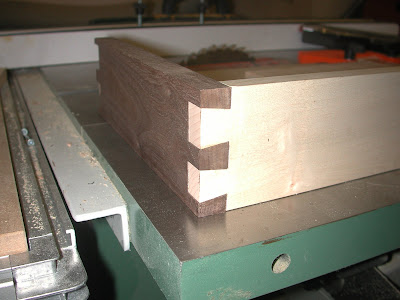
Here is the tail board...

Once I recut the tailboard, I then cut a pin board of maple to match my detailed tail board and the end result is the shadow dovetail.
Now, to add a complete shadow, I could have also cut a tailboard of walnut, mated it to the pinboard of maple and done the entire process to add the walnut shadow to the inside of the pin piece as well. However, as this was my first venture into this particular detail in dovetail joinery, I figured I'd take baby steps.
This process did involve more than a little hand chisel work as I made the pins proud, and for some reason the pin board fit WAY too tight into the tailboard when I joined the walnut to the maple. A few minutes spent with a nice sharp chisel and everything was a piston fit. I wasn't concerned with altering the fit of the jig, as I was only fitting the inlay, and not the final tail and pins.
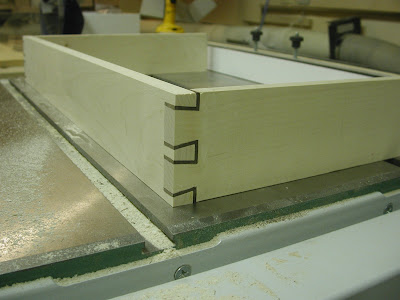
I used the Domino (once I found it....more on that later as well...stay tuned for another blog series) to align the apron to the table top. It all fit. I was happy because I didn't do a dry fit to find out. I either have that much faith in the Domino, or in my vast skills. D'OH. I just didn't want to put that dovetail joint together again as they fit the best the FIRST time, not the 4th.
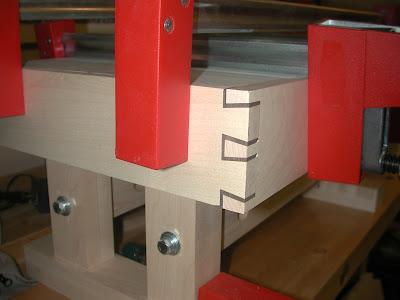
The camera with shadow and flash pics up some tear out that I can't appreciate with my eye, but here it is glued up, clamped, and awaiting the vise.
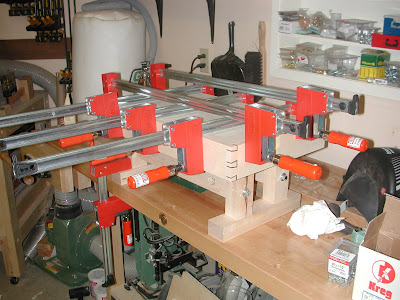
The next installment of this series will be the vice installation. Your guess is as good as mine as I'm trying to decide to run it the length of the table. I'm concerned about racking though so I may just run it 12". I havn't decided.
Thanks for taking a look!
Cheers!
1 comment:
Those are some beautiful joints you have there.
Post a Comment